To set up multi-factor authentication (MFA) for Microsoft 365, follow these steps:
Here is a quick video on how to setup MFA on your device:
Basic Steps:
- Sign In – Use your work account and enter your password as usual. After signing in, you’ll be prompted to set up additional security verification.
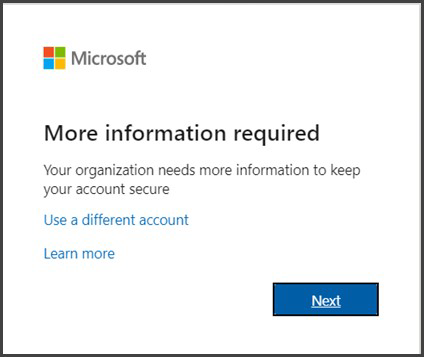
- Follow the Setup Prompts – Click Next to begin the MFA setup process.
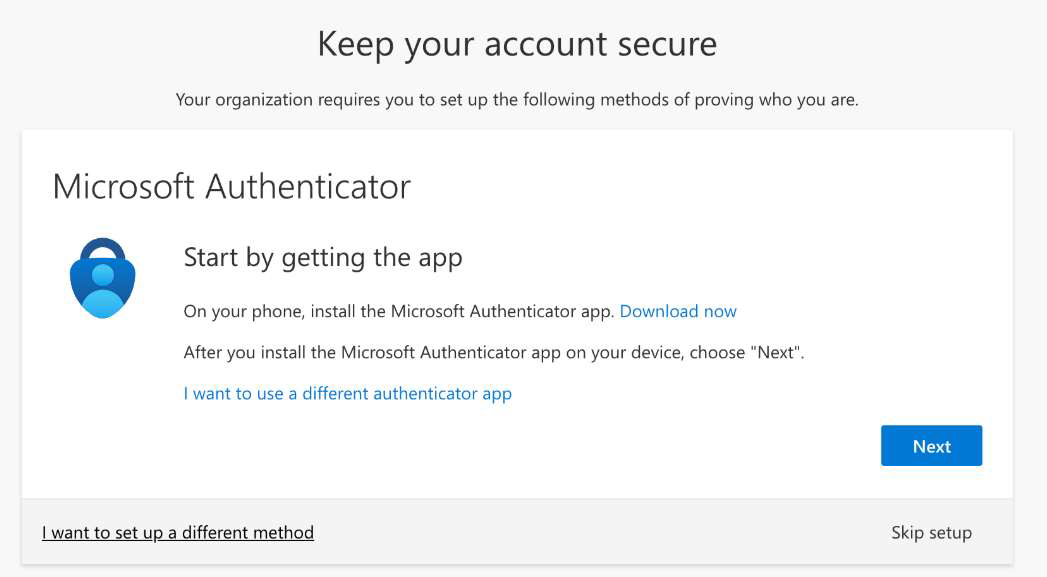
- Choose an Authentication Method:
- Microsoft Authenticator App (Recommended) – The default method is the free Microsoft Authenticator app. If installed on your mobile device, select Next and follow the prompts to link your account. If you don’t have it installed, a link will be provided to download it.
- SMS Verification (Alternative) – If you prefer, select "I want to set up a different method." Enter your mobile phone number, and Microsoft 365 will send you a 6-digit verification code via SMS to confirm your device.
- Microsoft Authenticator App (Recommended) – The default method is the free Microsoft Authenticator app. If installed on your mobile device, select Next and follow the prompts to link your account. If you don’t have it installed, a link will be provided to download it.
- Complete the Setup – Once your chosen authentication method is verified, MFA is activated on your account.
- Future Sign-Ins – The next time you sign in to Microsoft 365, you’ll be required to complete the additional verification step (such as entering a code from the authenticator app or an SMS). However, this is usually only needed when signing into a new device, app, or after a password reset—unless your organization enforces MFA for every login.


Tip: Using an authenticator app is recommended for better security and a faster login experience compared to SMS verification.